Monday, November 5, 2018

The Evolution of Phoenix (I, II, III, and (maybe), IV)

The very first Phoenix III built - Paul Hernes' Willy Wagtail
(photo courtesy Paul Hernes)
Mike Schuit wrote asking:-

Sorry if the answer to this question is common knowledge already, but I’ve been wondering about the nomenclature of the P3... was there a P1 &P2? What were those like and how different are they from what appears to be the final product? Will there ever be a P4? (the post is on the "Ross Lillistone Builder's Group Page on Facebook https://www.facebook.com/groups/RLBuilders/ ).

Here is my brief reply:-

Hi Mike, The original Phoeinix (1) was designed and built by my late father back in 1970. She is now coming up 49 years of age, and is still going strong, and still in our family. She is 15' 2" x 5' 11" built batten-seam multi-chine with marine plywood planking over Western Red Cedar stringers. No epoxy - resorcinol, nails, and screws.

She was originally rigged with a deck-stepped mast and a sloop (or "Knockabout") rig of 103 sq.ft. She has a lovely shape which manages to look traditional, but without trying pretentiously to appear that way. Many of the designs around these days try hard to look traditional, without it coming naturally as a by-product of their shape and layout.

Phoenix II was a design exercise on my part as part of my self-education, and never built.

Phoenix III was what came of that exercise when I was sort of forced into producing a buildable design for Paul Hernes (the builder of the first example). It was not Paul who forced me, by the way, but my old, deceased friend, Doug Laver. He told Paul I'd design the boat for him, even though nobody had bothered to tell me!

There is a Phoenix IV in my portfolio, but I haven't decided whether to make her public, because I like number III, and she is easy to build.

Phoenix (I) with her original rig. She was about 17 years old at the time of the picture.

Phoenix as she is now (photo courtesy Steven Lillistone)

Phoenix as she is now (photo courtesy Steven Lillistone)

Phoenix II - I do have drawings as well, but the half-model gives the idea.

Mike wrote back:-

"Also curious, if you would be willing to share, what sorts of alterations you are thinking of for the P4, if it were ever to come to pass. Completely respect your choice as a craftsman and a businessman if you would prefer to keep that under wraps, though".

Well, a number of years ago I drew a "New" Phoenix III hull - a sort of, "what I would have drawn originally if I had known then what I now know". The centre-of-buoyancy is a little further forward, and there is a bit more flare up forward. Also, the quarters are not as firm as on the original.

All of the above changes were aimed at producing a hull which has less need of being sailed flat. I would possibly have designed some of these features into the original Phoenix III, but I was trying to keep the number of hull planks to a minimum to make construction easier for a newcomer to glued-lapstrake construction. The resulting wide planks needed to be "developable", which means their shape when bent and twisted into position on the hull had to be a segment of a cylinder or cone at every point of along their lengths. This placed some limits on the three-dimensional shape I could design into the hull - particularly in the forward sections.

Here you can see the fine forward sections of Phoenix III - very nice for getting to windward in a chop and staying dry, or for rowing. (photo courtesy of Al Burke) 
When I started to draw a "New" Phoenix III, I decided to disregard the need for developable planks, and the constraint they place on hull shape. In order to achieve that freedom, I judged that I would need at least eight planks - instead of the five on the original design.

The lines of the "New" Phoenix III. Note that the curved black line at the bottom of the picture do not represent the other side of the boat - they are the developed shapes of the diagonals. 

A very basic rendering of the hull shape

A very basic rendering of the hull shape
The new hull shape is pleasing to my eye, but when I ran some hydrostatic calculations and some hull resistance predictions, I discovered that the original boat was as good or better than the new one. Having discovered this, I reflected upon my egotistical thoughts, and decided to leave Phoenix III exactly as she was when I first drew her back in 2003.

I do have another embryonic design for a 15 foot boat, but she is not a replacement for Phoenix III. She is a different boat - heavier, beamier, and with a layout similar to that used in Periwinkle. This boat is derived from a 17 foot hull I have in the works, but shorter by two feet, and about 3 or 4 inches less beamy. She also has very slightly less freeboard than the 17-footer. Don't hold your breath waiting for these designs to be published, though...

Proposed 15ft x 5ft design
What really matters to me (and I am very biased about this) is that more "Sail and Oar" boats start populating our waterways. There is a wholesomeness, independence, and versatility wrapped up in the sail-and-oar movement, and I believe that such boats and the associated activity is good for the body and soul. Day-sailing, beach-cruising, rowing, picnicking, expeditioning - all carried out in something which you can make with your own hands, for relatively little money.

Thursday, May 24, 2018

Trim, Seamanship, and Small Boats


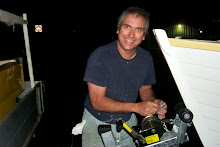
Hugh Blank purchased plans for First Mate in 2009, and after seven years of building (interrupted by a very heavy work schedule), launched the boat in 2016. Hugh is the man for whom the Bermudan and Balance Lug rigs were added to the plans.

I have received an interesting message from Hugh regarding certain observations he has made about using the boat, and he has agreed to me making his comments, and my reply, public. This is a good way for us all to benefit from the experiences of individual builders:-


I have sorted out how I use the standing lug rig for casual racing at my club, and also happy with the way the main can be used with the jib I have. Gives me plenty of options, depending on crew available.

The other day I had occasion to try the boat out in preparation for the other activity I built it for - cruising. I was planning to take a trip out to an island a couple of kilometres offshore, in some water that can get fairly boisterous. In preparation for this trip I took the boat down to the inner harbour at Porirua, one of two places I usually sail at - the other being the other arm of the same harbour. The wind was about 12 to 15 knots, with gusts up to about 25 knots - fairly much what you need to allow for around Wellington. There was a short little chop in the harbour, of about 1 to 2 feet.The main point of this exercise was to make sure I could raise and lower the (reefed) main in these conditions. Although there are a few small changes I am busy making to my set up - as a result of this little expedition - there are a couple of fundamental issues I came across for the first time in the boat: - When well forward in the boat - I was sailing on my own - I found that the boat pitched rather alarmingly while I was trying to manipulate the rigging. (And for that matter when dealing with the anchor at another stage.)- Part of the problem was probably caused by the fact that the centreboard case prevented my being able to balance the boat better by keeping central as much as possible. But I do also feel that there may be too little buoyancy in this part of the boat, to allow even my weight (about 72 kg) to be perched on one side of the centrecase, right forward by the mast. You may remember I asked you when building the boat about substituting a more conventional centreboard/centrecase arrangement. My original concern was the inconvenience (of the height) to any crew, and I have found this to be the case to some extent. I am now inclined to modify the arrangement for the original reason, plus the newly identified issue. Can you please comment - perhaps I am missing some points or barking up the wrong tree - has been known to happen! As for the buoyancy forward, I haven't seem a P3 in the flesh for a while, but looking at photos I just wonder if that version of the boat doesn't have just a bit more volume forward. I guess the advantage of slenderness in the bow is amply evident in the way the boat moves so nicely through the water. And I appreciate that every design is a compromise of the often conflicting forces of physics and desired outcomes. I would however appreciate your input concerning how to use the boat safely and effectively for the cruising activities I have in mind. I don't intend to go to mad places, but I want to be able to work with the rig in 1 metre+ seas. CheersHugh 22.05.18


This message brings up a number of issues, with the primary one being reserve buoyancy and stability when the centre-of-gravity of the boat and crew is moved too far forward. In a small boat, it is basic seamanship to keep weight out of the ends as much as possible, and keep weight as low as possible. Loss of stability is most pronounced when crew weight is moved to the bow - as Hugh has discovered! What he described is a very common phenomenon - even in boats with legendary seaworthiness. Phil Bolger's Gloucester Light Dory Type 6 is renowned for exceptional sea-kindliness, but even the designer stated that if you move too close to the bow, the boat will flick you overboard and come up laughing, without taking water.


I accept that a modified centreboard shape would allow a lower case, and perhaps one could stay on centreline while moving closer to the mast partner. But the distance from the point at which the existing centreboard case starts rising up (very close to the forward edge of the thwart) to the mast partner is only 3' 5" - well within reach of a person with arm extended while leaning the body forward. If I was intending to work on the mast partner, I would straddle the centreboard case on my feet, in a crouching position and lean forward. Better still, if conditions were bad, I would sit on the bottom of the boat on one or other side of the case. In my experience sailing First Mate I have not had a problem, but I do accept Hugh's comments.


If in doubt, head for a handy beach or sandbank when you decide to reef. It is much easier, and going ashore on a bank is fun in itself.


My idea is that as much boat work as possible should be done from the middle of the boat. Here are some photos of how I rigged the First Mate I built for my friend, Ian Hamilton.


Mast lashed into the partner. On the port side you can see the boom downhaul, and on the starboard side, the halyard. The down-haul is a double purchase and the halyard a single purchase. Both of these lines are the blue ones, and on the far starboard side you can see a Hemp-coloured line - that is the running yard parrel.


In this view you can see how the halyard and downhaul both run through the partner, through bull's-eye fairleads, and then back to belay on the side of the centreboard case, in easy reach of the helmsman. The lines could just as easily run through turning blocks on the upper side of the partner, but my method keeps the lines lower.


View from the port-side, showing the downhaul. The halyard and down-haul are the only lines which require frequent attention. Some people may say that V-jammers are not adequate for holding these lines securely - well, in that case use horn cleats instead.


I am not against the idea of a different centreboard and centreboard-case shape, but do keep in mind that the high case prevents water entry in rough conditions in a partially flooded boat - say, after a capsise. I have a number of drawings for higher aspect ratio boards with cases which are no higher than the thwart, but there are difficulties getting the required centreboard area without having the case extend aft of the thwart into the main cockpit area. If I thought that I really needed a lower case, I would use a daggerboard. Nothing is worse for the performance of a sailing dinghy than having a board which does not have enough area. Boat-speed is seriously compromised, and windward ability is degraded.


It is correct to say that First Mate (and Phoenix III) do not have a huge amount of reserve buoyancy forward. But all boat designs are made up of a long list of compromises, and my stated aims from the beginning included the ability to cut through a steep chop with minimal pounding and spray generation, plus a hull shape conducive to satisfying performance under oars. Both of these designs have proven to be unusually dry for their size and speed, as well as being pleasant to row.


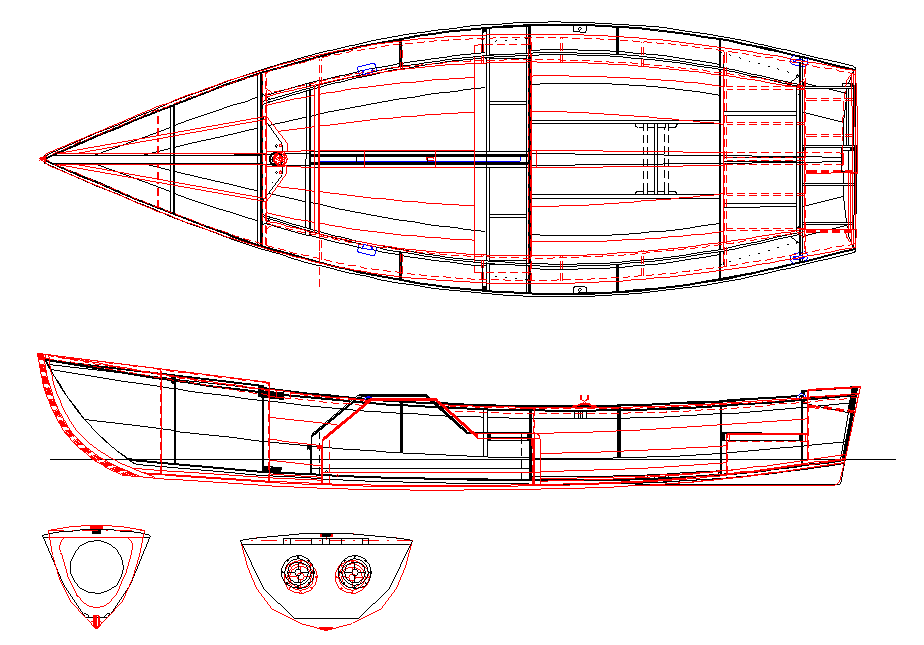
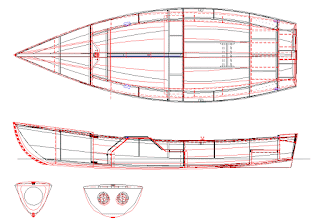
Hugh has asked whether Phoenix III has more volume, relatively speaking, than First Mate in the forward sections. Both boats have the same designed displacement, and their centres-of-longitudinal displacement vary by only a tiny fraction over 1%! So as far as the numbers are concerned they are very, very close.However, Phoenix III may have a little more reserve buoyancy forward, as these sketches show (First Mate in black and Phoenix III in red).


As for working in 1 metre+ seas, First Mate has done this many times with ease.


Maybe not a metre, but a lumpy swell, none the less...


Leaping clear of a choppy wave...


Heading down below the chop-line.


On the day that the above photos were taken, the boat was being sailed by my son, David. He has the longitudinal trim just about perfect, sitting either on the bottom up against the main thwart, or on the side-deck in the same longitudinal position. Longitudinal trim is critical to efficient sailing. Note also that even though he is hard on the wind in the first two pictures, he has not over-sheeted the main, therefore giving the lugsail room to breath. The boat was sailing really nicely, and Dave said that not a drop of water came into the boat in all the time we were out there shooting photos and video.


When it comes to anchoring, it is best to have the anchor stowed low in the boat, preferably in the bin just in front of the centreboard case. If conditions are such that one cannot safely handle the anchor rode from a crouching position forward, I would start the trip with the anchor-rode made-off to the stem-eye (trailer winch attachment point) and lead aft to enter the boat over the side, to be coiled down in the anchor bin. It would be sensible to run it up over a bow-chock or similar to prevent it dragging in the water. Before deploying the anchor, clip a snap-shackle over the anchor-rode, attached to a two or three metre length of line leading into the boat near the thwart, and securely attached to a hard point. The anchor can then be lowered over the side from within the cockpit (never throw the anchor). The anchor-rode will then pull against the stem-eye, which is relatively low to the water. The separate snap-shackle and line will slide loosely on the anchor rode, until you want to retrieve the anchor. By hauling in on the short line with the snap-shackle, the anchor-rode will be brought back to your hands in the cockpit for retrieval. If caught out without a snap-shackle, a simple bowline in the end of the lanyard will do the job.


These are small boats, despite their 15 foot LOA, and need to sailed with understanding and the application of seamanship. Sailed within their natural limitations they will give reliable performance, and their light-weight will be of enormous benefit in the long-term.

Saturday, January 6, 2018

Simple Cruising

This is a re-print of a very short article I wrote for an Australian magazine about fourteen years ago. I tend to cringe when I re-read my work from the past, but there may still be something in the words....


The 15' 2-1/2" Cruising Dinghy referred to in the text. This photo should convince skeptics that a Lug-Sail can set well and take a boat to windward efficiently.

When it comes to boatbuilding, dreams don’t always come true. Those of us who are afflicted with this boat addiction know the cycle – thinking about one boat leads to thoughts about another and so on to eternity. The dreams are necessary, because without them nothing would ever get done; however they need to be kept under control.

Mike Rowe and his friend Ian were both dreamers. However as youth gave way to middle age, the dreams had become more realistic – the size and complexity of their dreamboats had reduced in inverse proportion to their experience.

As they relaxed in the cockpit of Mike’s little cat-yawl, the conversation had turned to this very subject…

“Why is it,” said Mike, “that there are so few decent cruising dinghies on the market?”

“Because people automatically assume that if you are going to sleep aboard a boat, you need a cabin,” answered Ian. “Look at the boom in production trailerable yachts during the seventies and eighties – everybody wanted the convenience of a trailer boat with the accommodations of an H28. But what they got was a very small cabin boat which was difficult to launch and retrieve, heavy to tow, too big to store in a garage and took too long to rig and unrig. No wonder the bubble burst!”

Mike stared thoughtfully at the wake before answering. He was remembering that some of his best boating experiences had taken place in a 15-½ foot cruising dinghy, sleeping on the floorboards under a makeshift boom-tent. But he was also thinking about sand, clutter, wet clothes and mosquitoes.

“You’re right, Ian, but to be fair, lots of people did lots of sailing in those trailer-sailers. To make dinghy cruising successful one has to be better organised than we have ever been.” was his response, “Let’s take a look at what is required.”

They talked well into the evening, enjoying the easy companionship which came from common interests and a friendship which dated from high school. It would take too much space to record the entire conversation, but a number of points kept cropping up: -

·        Simple projects are more likely to be finished than those which are large and complicated;
·        Small boats get used more than large ones;
·        Small boats are easy to store in a garage;
·        We live in a wonderful country for boating;
·        It is liberating as well as challenging to leave the motor at home;
·        Shoal draft boats have access to cruising grounds denied to keelboats;
·        Cabins don’t get used as much as cockpits, so we should think twice before trading cockpit space for a cabin;
·        There are very few open boats on the market which lend themselves to daysailing and overnighting. This is especially the case if spirited sailing performance is a high priority;

  The irony of this line of conversation was that it took place in the cabin of a particularly comfortable and capable keelboat, measuring only 15-½ ft LOA. She was relatively light, had been simple to build at home, carried not one inch of standing rigging, and got to windward better than most. This sparkling performance was due to brilliant design on the part of a designer who was blessed with an open mind. His deep understanding of hydrodynamics allowed him to wring good performance from his designs – even (especially) those with rectangular hull sections. He had been schooled by such greats as Lindsay Lord, L. Francis Herreshoff, and Howard Chapelle. Although known for his rectangular boats, about ninety percent of his published work was classic and conventional.


In the following week, Mike continued working on a group of three boats in his workshop. All were capable open boats ranging in size from 12ft to 18ft length-over-all; two were cruising dinghies of the very type which he had been discussing with his friend. He hoped that this situation was an indication that the wheel was turning a full circle.


These days, as always, building a small boat is a fine investment of your time. Whether it be a sailingboat, a powerboat, a beautiful rowing craft or a canoe, the result will be worth the effort. But effort and application are required – dreams are only the first bit. Dreams, like so many other things, can be addictive. Pick a simple project and start!